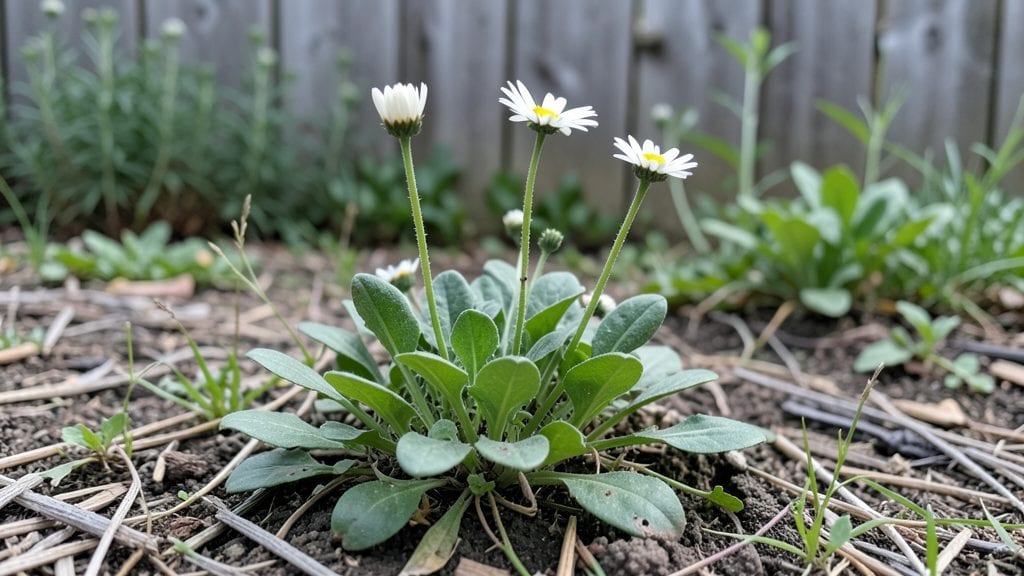
How to plant and maintain English daisy perennials for natural spread
English daisies (Bellis perennis) are one of the easiest perennials to grow, thanks to their natural spreading habit and cold-hardy nature. With the right soil preparation and light conditions, they’ll form dense ground cover that blooms repeatedly from early spring to frost.
The key to their success lies in mimicking their native European meadow habitats—where they thrive in open, sunny spots with well-drained soil.
Unlike annuals, these perennials return year after year, rewarding gardeners with low-maintenance beauty. However, their spread isn’t always controlled—so understanding pruning techniques and seasonal care will help you guide their growth while preventing overcrowding.
Let’s dive into the step-by-step process to establish a thriving patch of English daisies that spread effortlessly.
Step-by-Step Guide to Planting and Maintaining English Daisies
-
Step 1: Choose the Right Location
Select a spot with full sun (6–8 hours daily) and well-draining soil. English daisies tolerate partial shade but produce fewer blooms. Avoid low-lying areas where water pools, as soggy soil leads to root rot.
-
Step 2: Prepare the Soil
Amend heavy clay soil with compost or sand to improve drainage. English daisies prefer slightly acidic to neutral soil (pH 6.0–7.0). Test your soil and adjust with lime (to raise pH) or sulfur (to lower pH) if needed.
-
Step 3: Plant at the Right Time
Plant bare-root divisions or plugs in early spring (March–April), after the last frost when soil temperatures reach 60°F (15°C). Space plants 6–12 inches apart to allow room for natural spread.
-
Step 4: Water Deeply After Planting
Water thoroughly at planting to settle the soil, then water deeply once a week during the first growing season. Avoid overhead watering to prevent fungal diseases like powdery mildew. Mulch with 2–3 inches of straw to retain moisture.
-
Step 5: Encourage Spread with Light Pruning
After the first bloom cycle (late spring), trim spent flowers to redirect energy to root growth. In early fall, cut back 1/3 of the foliage to promote self-seeding and denser growth. Avoid heavy pruning, as daisies spread via stolons and seeds.
-
Step 6: Divide Overcrowded Clumps
Every 3–4 years, divide mature clumps in early spring or fall to prevent decline. Dig up the plant, separate the root crowns, and replant sections. This rejuvenates growth and controls spread in unwanted areas.
-
Step 7: Seasonal Care Tips
Spring: Fertilize lightly with 10-10-10 to encourage blooms. Summer: Deadhead regularly to prolong flowering. Fall: Reduce watering as growth slows. Winter: Leave foliage for insulation in USDA zones 3–9.
One of the most common mistakes gardeners make is overwatering English daisies, which can suffocate roots and lead to disease. These plants are surprisingly drought-tolerant once established, so let the soil dry slightly between waterings.
Another pitfall is planting too deeply, which can cause crown rot. Always keep the crown just above soil level.
To maximize their natural spread, avoid using herbicides near your daisy patches, as they’ll kill the plants and their self-seeding offspring. Instead, use organic mulch like straw or shredded leaves to suppress weeds while allowing daisies to propagate freely.
With minimal effort, your garden will soon be dotted with cheerful white, pink, or red blooms that attract pollinators like bees and butterflies.
For a low-maintenance border, let the daisies spread naturally along pathways or garden edges. Their compact growth habit makes them perfect for filling gaps between stepping stones or cascading over small walls.
Just remember: the more you prune, the less they’ll spread—so adjust your approach based on whether you want a controlled clump or a wildflower meadow effect.
🌼
★★★★★4.6(6 reviews)
|